Setting up Leaky Paywall
Plugin Installation
Download Leaky Paywall here.
If you're just getting started, In your WordPress admin go to Plugins > Add New > Upload. Find the zip file of the plugin files and upload it to your site. After you upload the plugin you can activate it.
In your WordPress admin, go to Leaky Paywall > Settings > General and then click on the "Pages" section.

1. Create a page for the login
Add the shortcode [leaky_paywall_login] to your login page and in the Leaky Paywall options select the page from the Page for Log In dropdown.
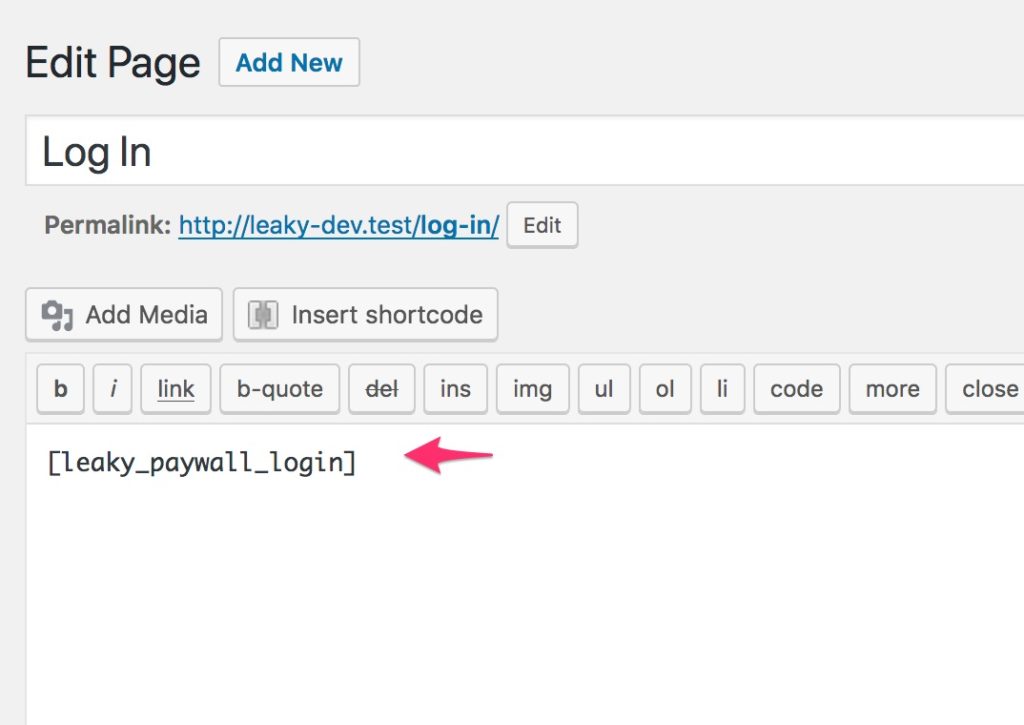 The page should now look like this:

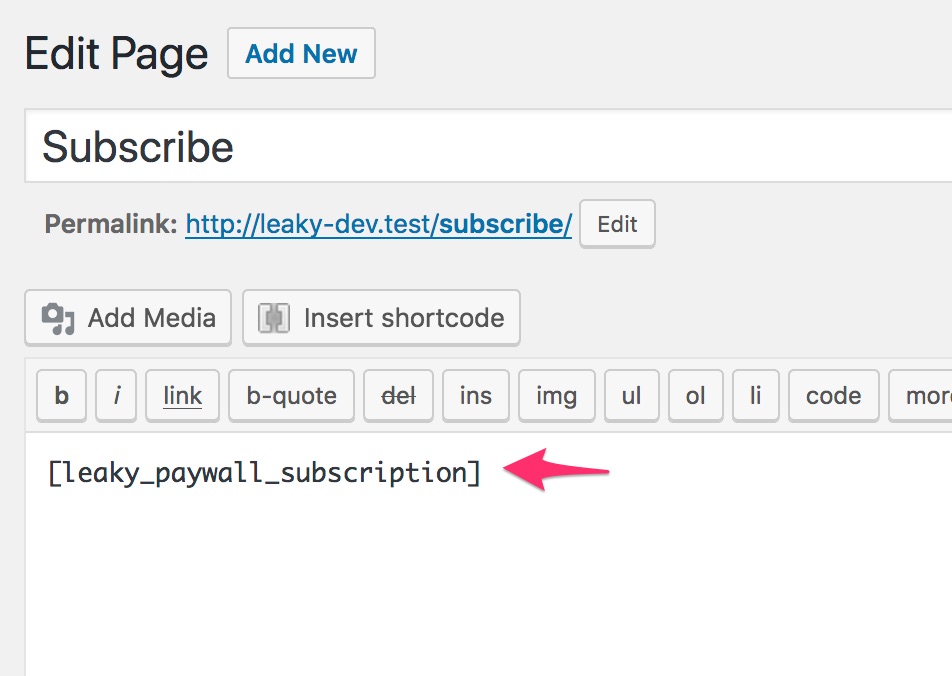
2. Create a page for the subscribe cards
Add the shortcode [leaky_paywall_subscription] to your subscription page and on the Leaky Paywall options select the page from the Page for Subscription dropdown.
After you add your subscription level(s), the page should look like this: 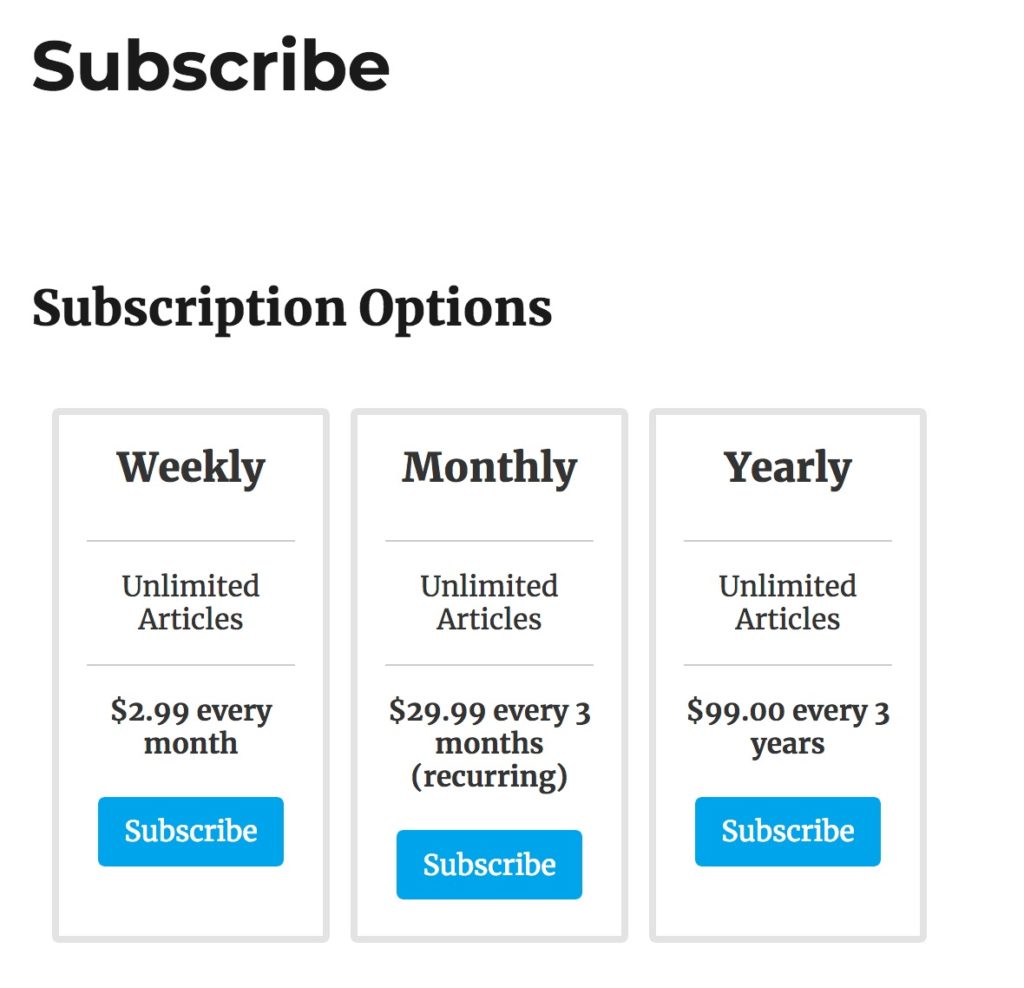
3. Create a page for the register form
You will need to create a page for the Register Form if you plan to use Stripe Credit Card as your payment gateway and/or enable Paypal. 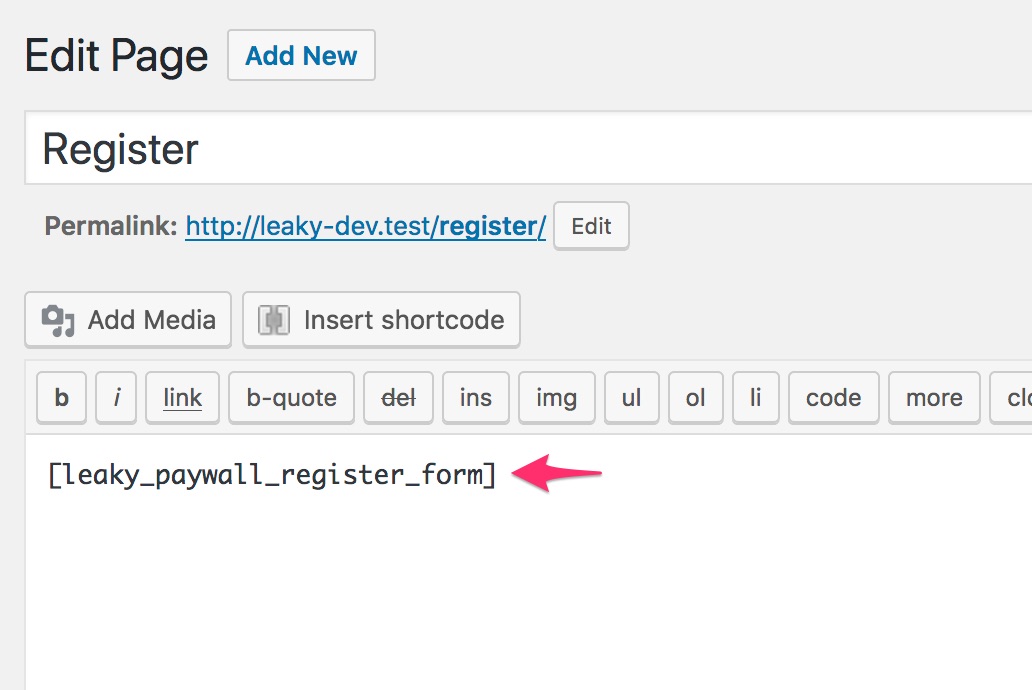
After adding subscription level(s), the registration form will look like this: ![]()
4. Create a My Profile or My Account page
Add the shortcode [leaky_paywall_profile] to your my profile page and on the Leaky Paywall options select the page from the Page for Profile dropdown. If using multisite, the My Account page will also show all current subscriptions that a subscriber has running in one spot regardless of which publication they are visiting.

On this page a subscriber can:
- Change their personal info
- See what they are subscribed to
- Update their credit card info with Stripe. PayPal simply links them to PayPal.
- Cancel their subscriptions
- Log in and log out
5. Set a page for the subscriber to be redirected to after they subscribe
This can be a new page or an existing page such as My Account. If you would like to redirect a subscriber to the content they were viewing before registering, use our Registration Redirect add-on.
6. Add links to your subscription and login pages
You could place them in your main menu or a sidebar widget.
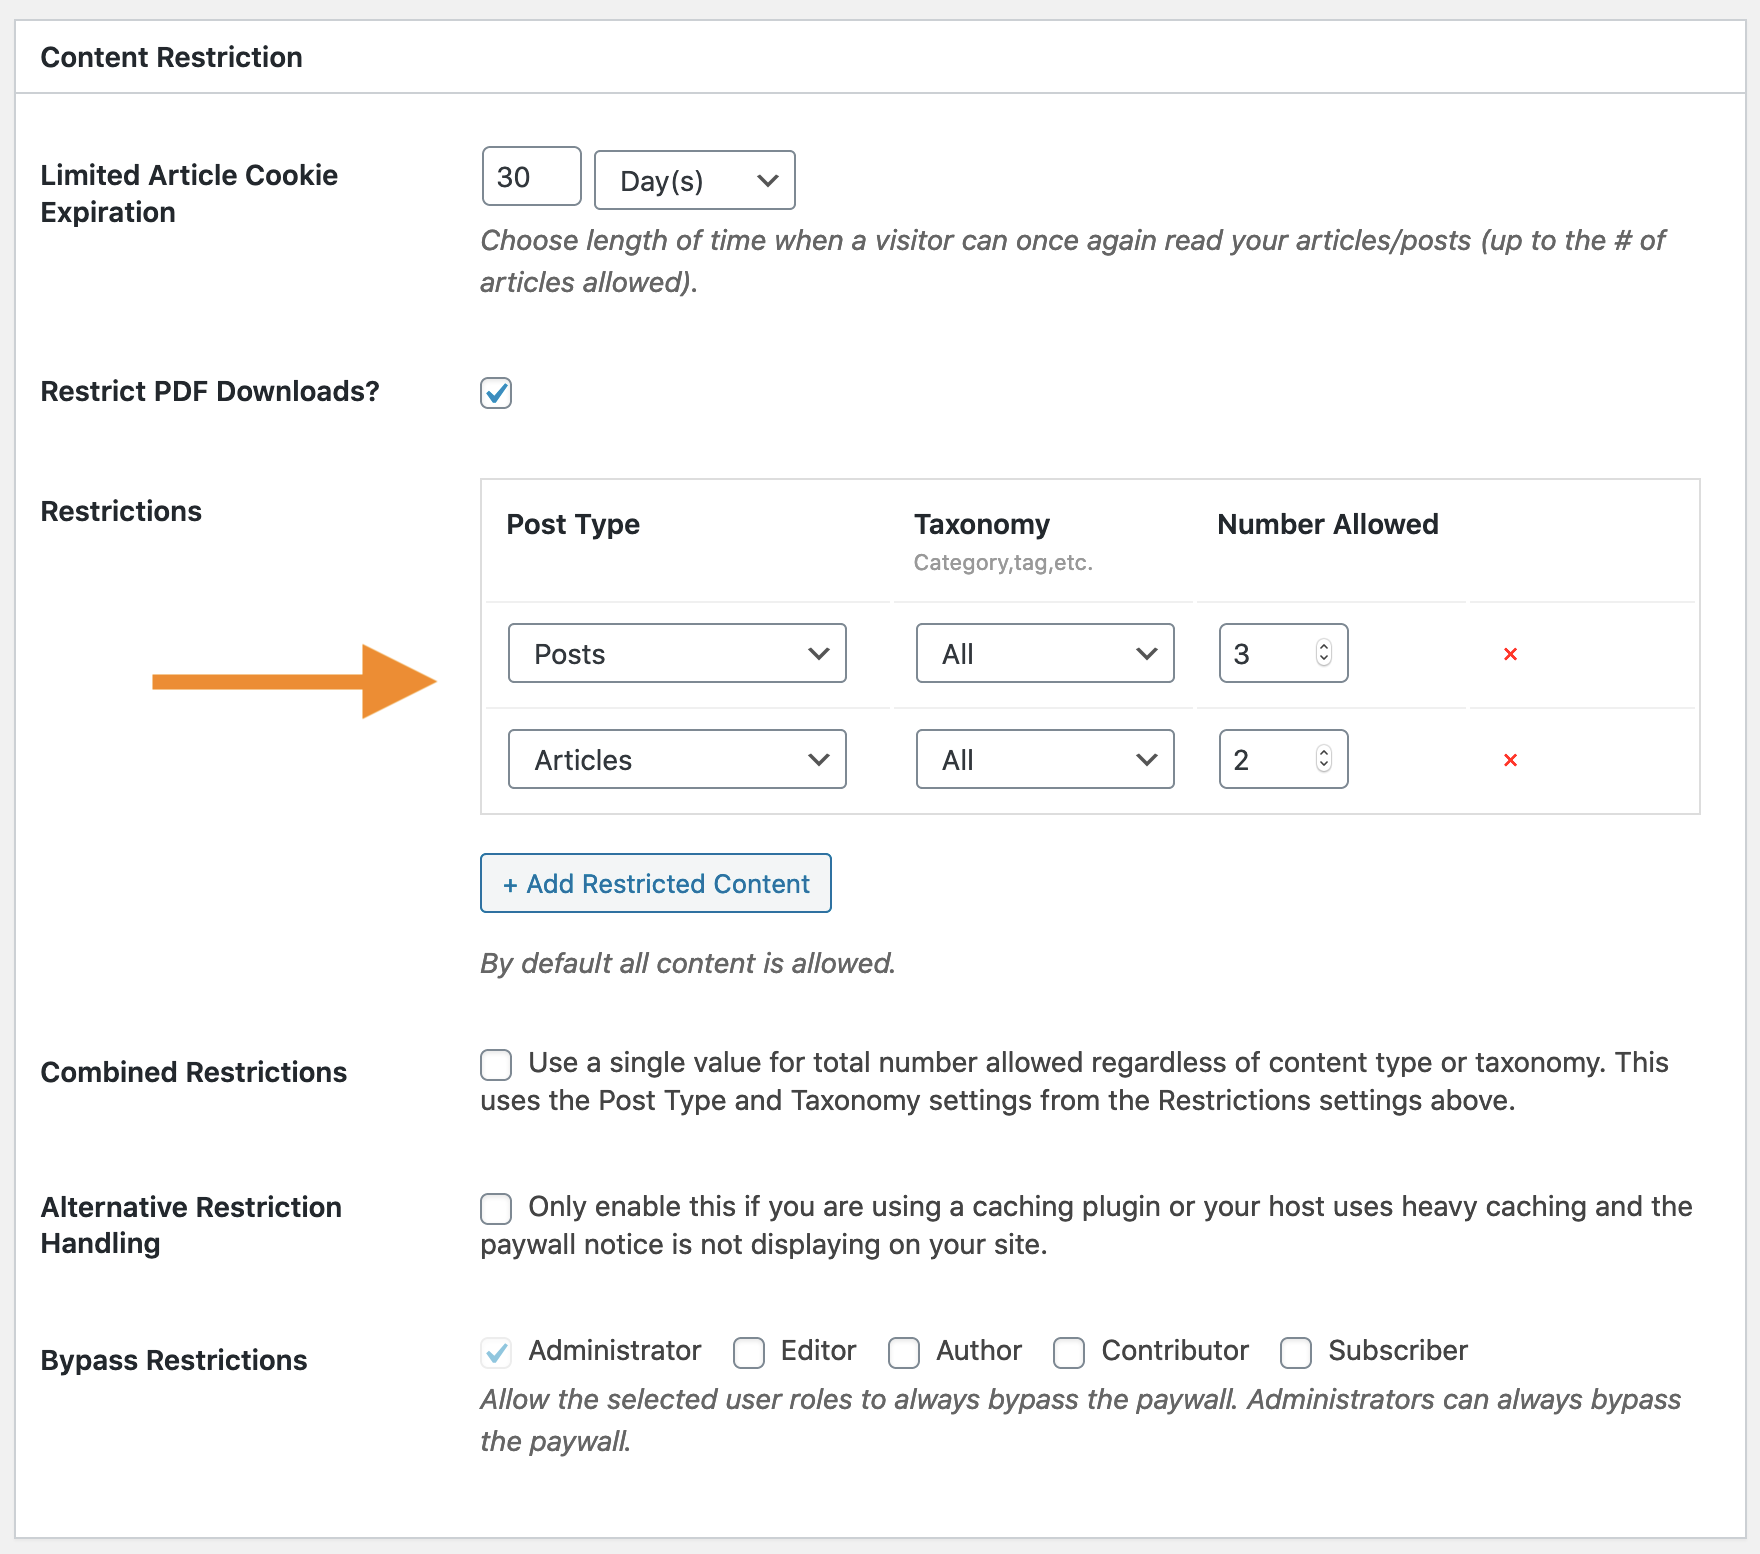
7. Set the content restriction options
On the Subscriptions tab, choose the type of content to restrict and how many views are allowed. For more detailed information on our content restrictions and how they work, please view our article ' How Leaky Paywall’s Content Restrictions Work'.
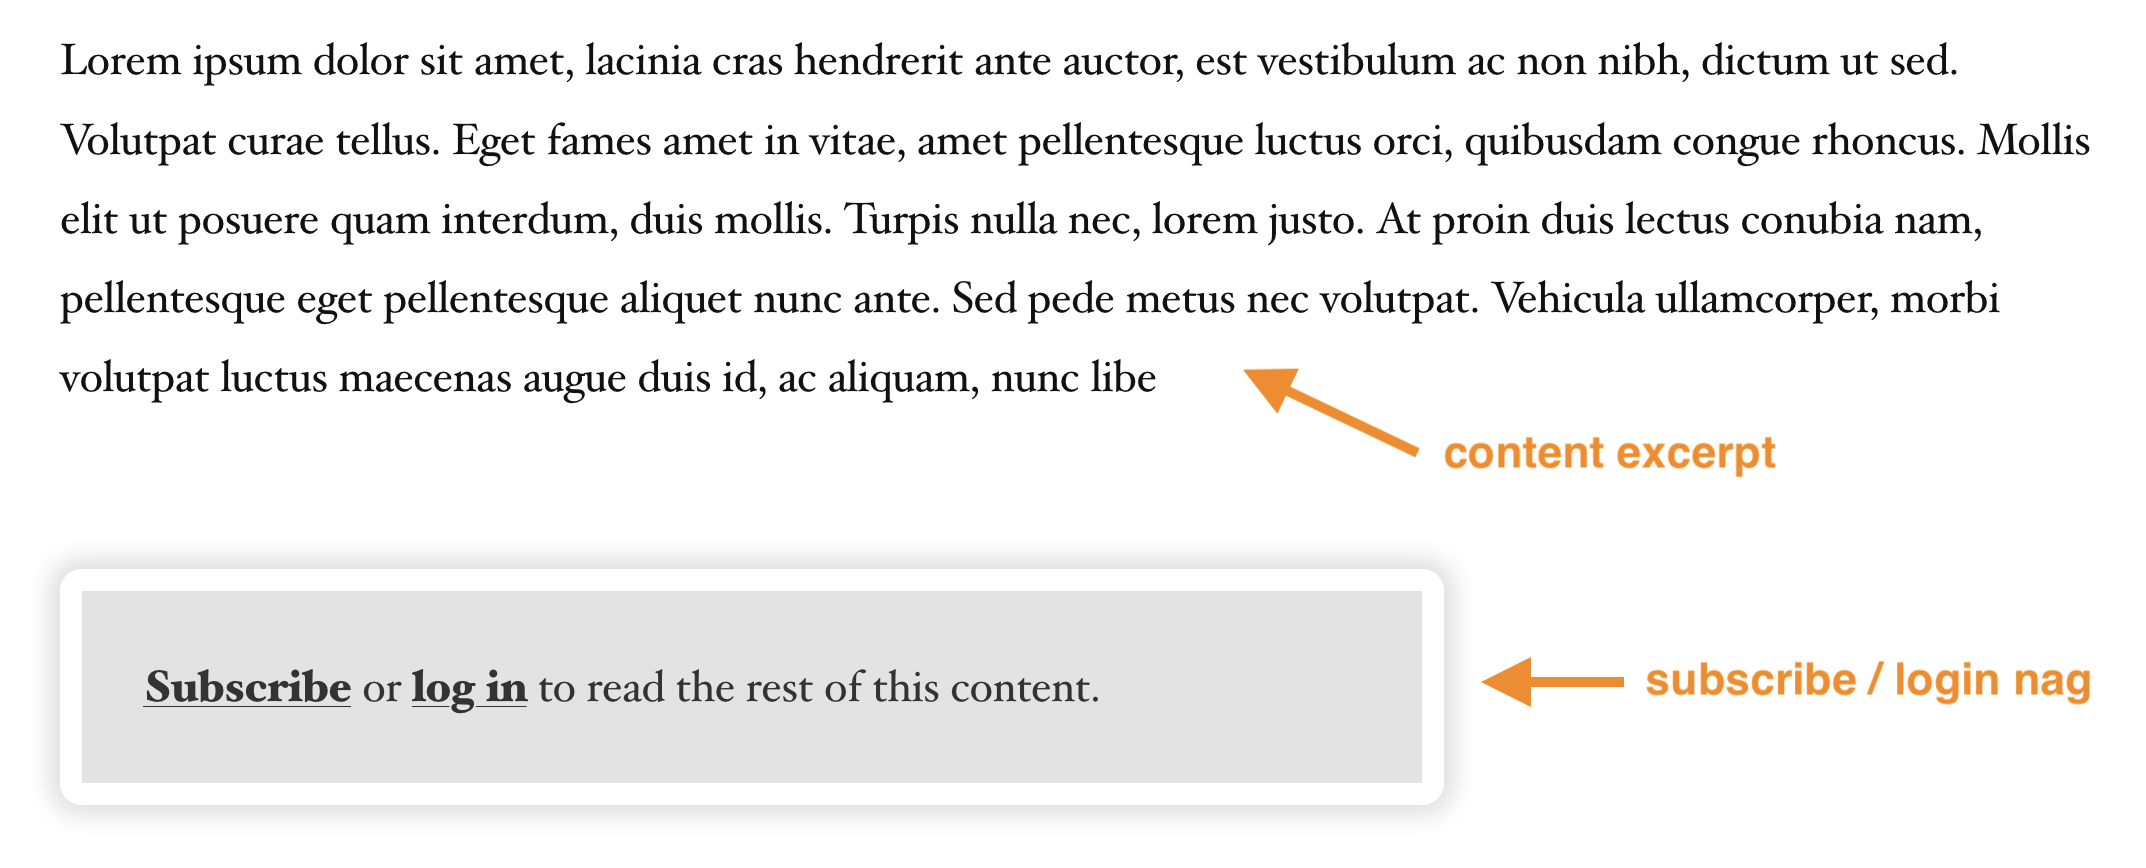
 When a user hits their article limit, they will see the the subscribe nag with a message to subscribe or login. This message can be
customized on the General tab.
When a user hits their article limit, they will see the the subscribe nag with a message to subscribe or login. This message can be
customized on the General tab.
8. Create subscription levels
Set the name of the subscription level, if it will be recurring (or one time), the price of the subscription in dollars, the subscription length, and what the user has access to with the subscription level. You can add multiple access options by clicking on “Add New Post Type”.
You can create as many levels as you need using our Multiple Levels add-on.
You can create recurring subscriptions using our Recurring Payments add-on.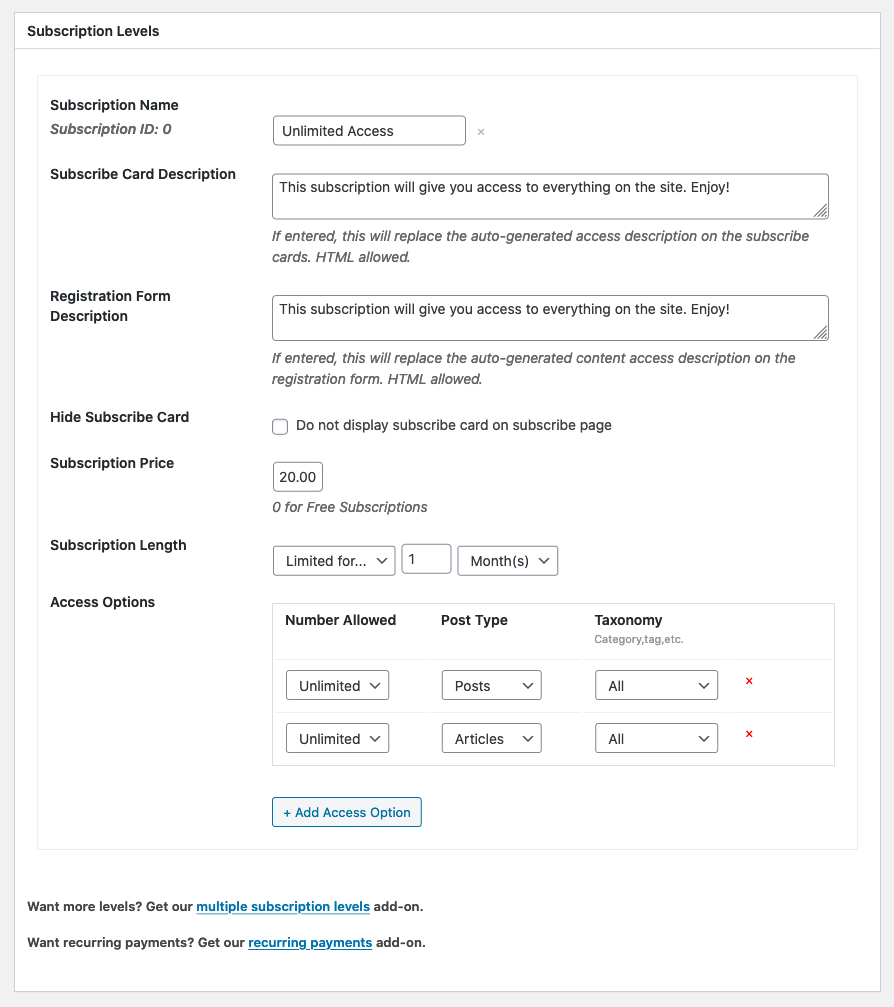
9. Enter payment gateway settings
On the Payments tab, choose one of the Stripe options, Paypal Standard, or both (do not enable both Stripe options). Enter the API keys from your Stripe and/or Paypal accounts.

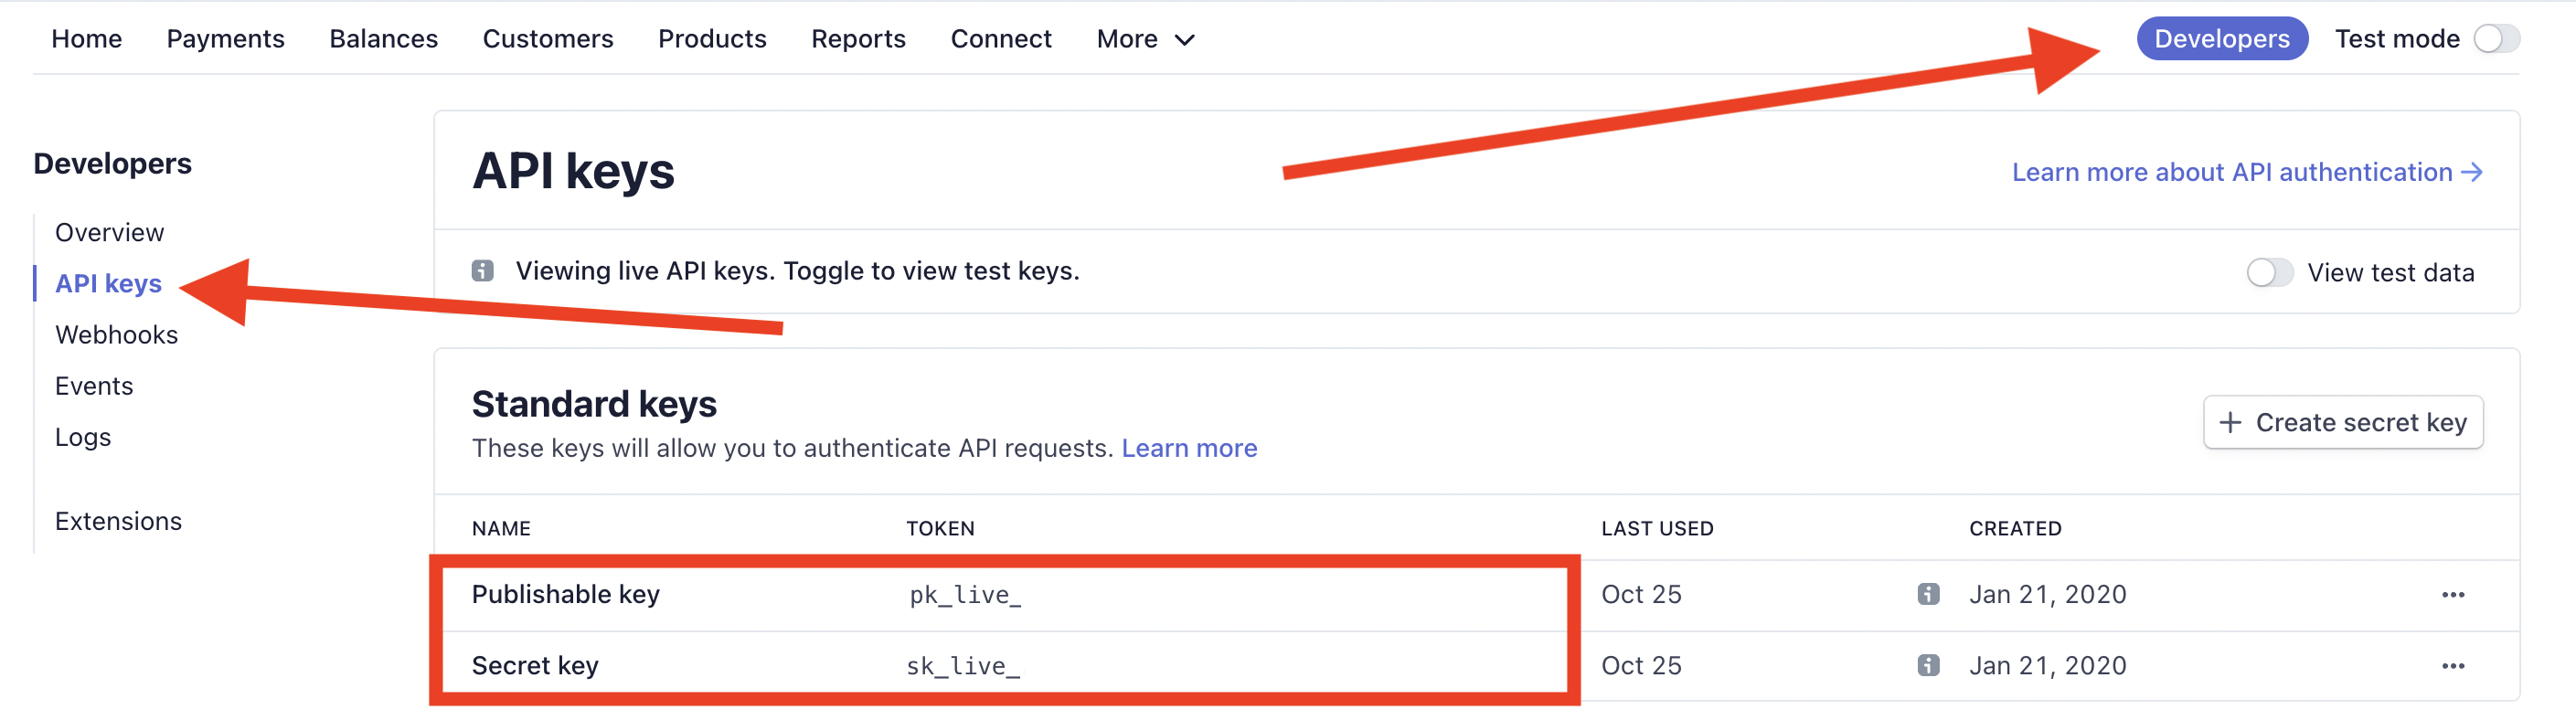
For Stripe, go to Developers -> API keys -> and copy your Publishable key and your Secret key.
*If you are testing (non-live mode), set Stripe to "Test mode" and use test Publishable key and test Secret key.
 The keys will look like this (where Xs represent numbers/letters) :
sk_live_XXXXXXXXXXXXXXXXXXXXXXXXXXXXXXXXXX
Copy your Stripe Publishable key to Live Publishable Key and your Stripe Secret key to Live Secret key in Leaky Paywall.
*If you are testing (non-live mode), add test Publishable key and test Secret key.

Next, we need to set up our webhooks in Stripe so Leaky Paywall stays up to date with payments in Stripe. Copy the Stripe Webhook URL in Leaky Paywall Stripe settings.
 In Stripe, go to Developers -> Webhooks -> Add endpoint.
 Paste your Stripe Webhook URL from Leaky Paywall to Endpoint URL.
Next, click on Select events.

Check the Select all events box and Add Events.

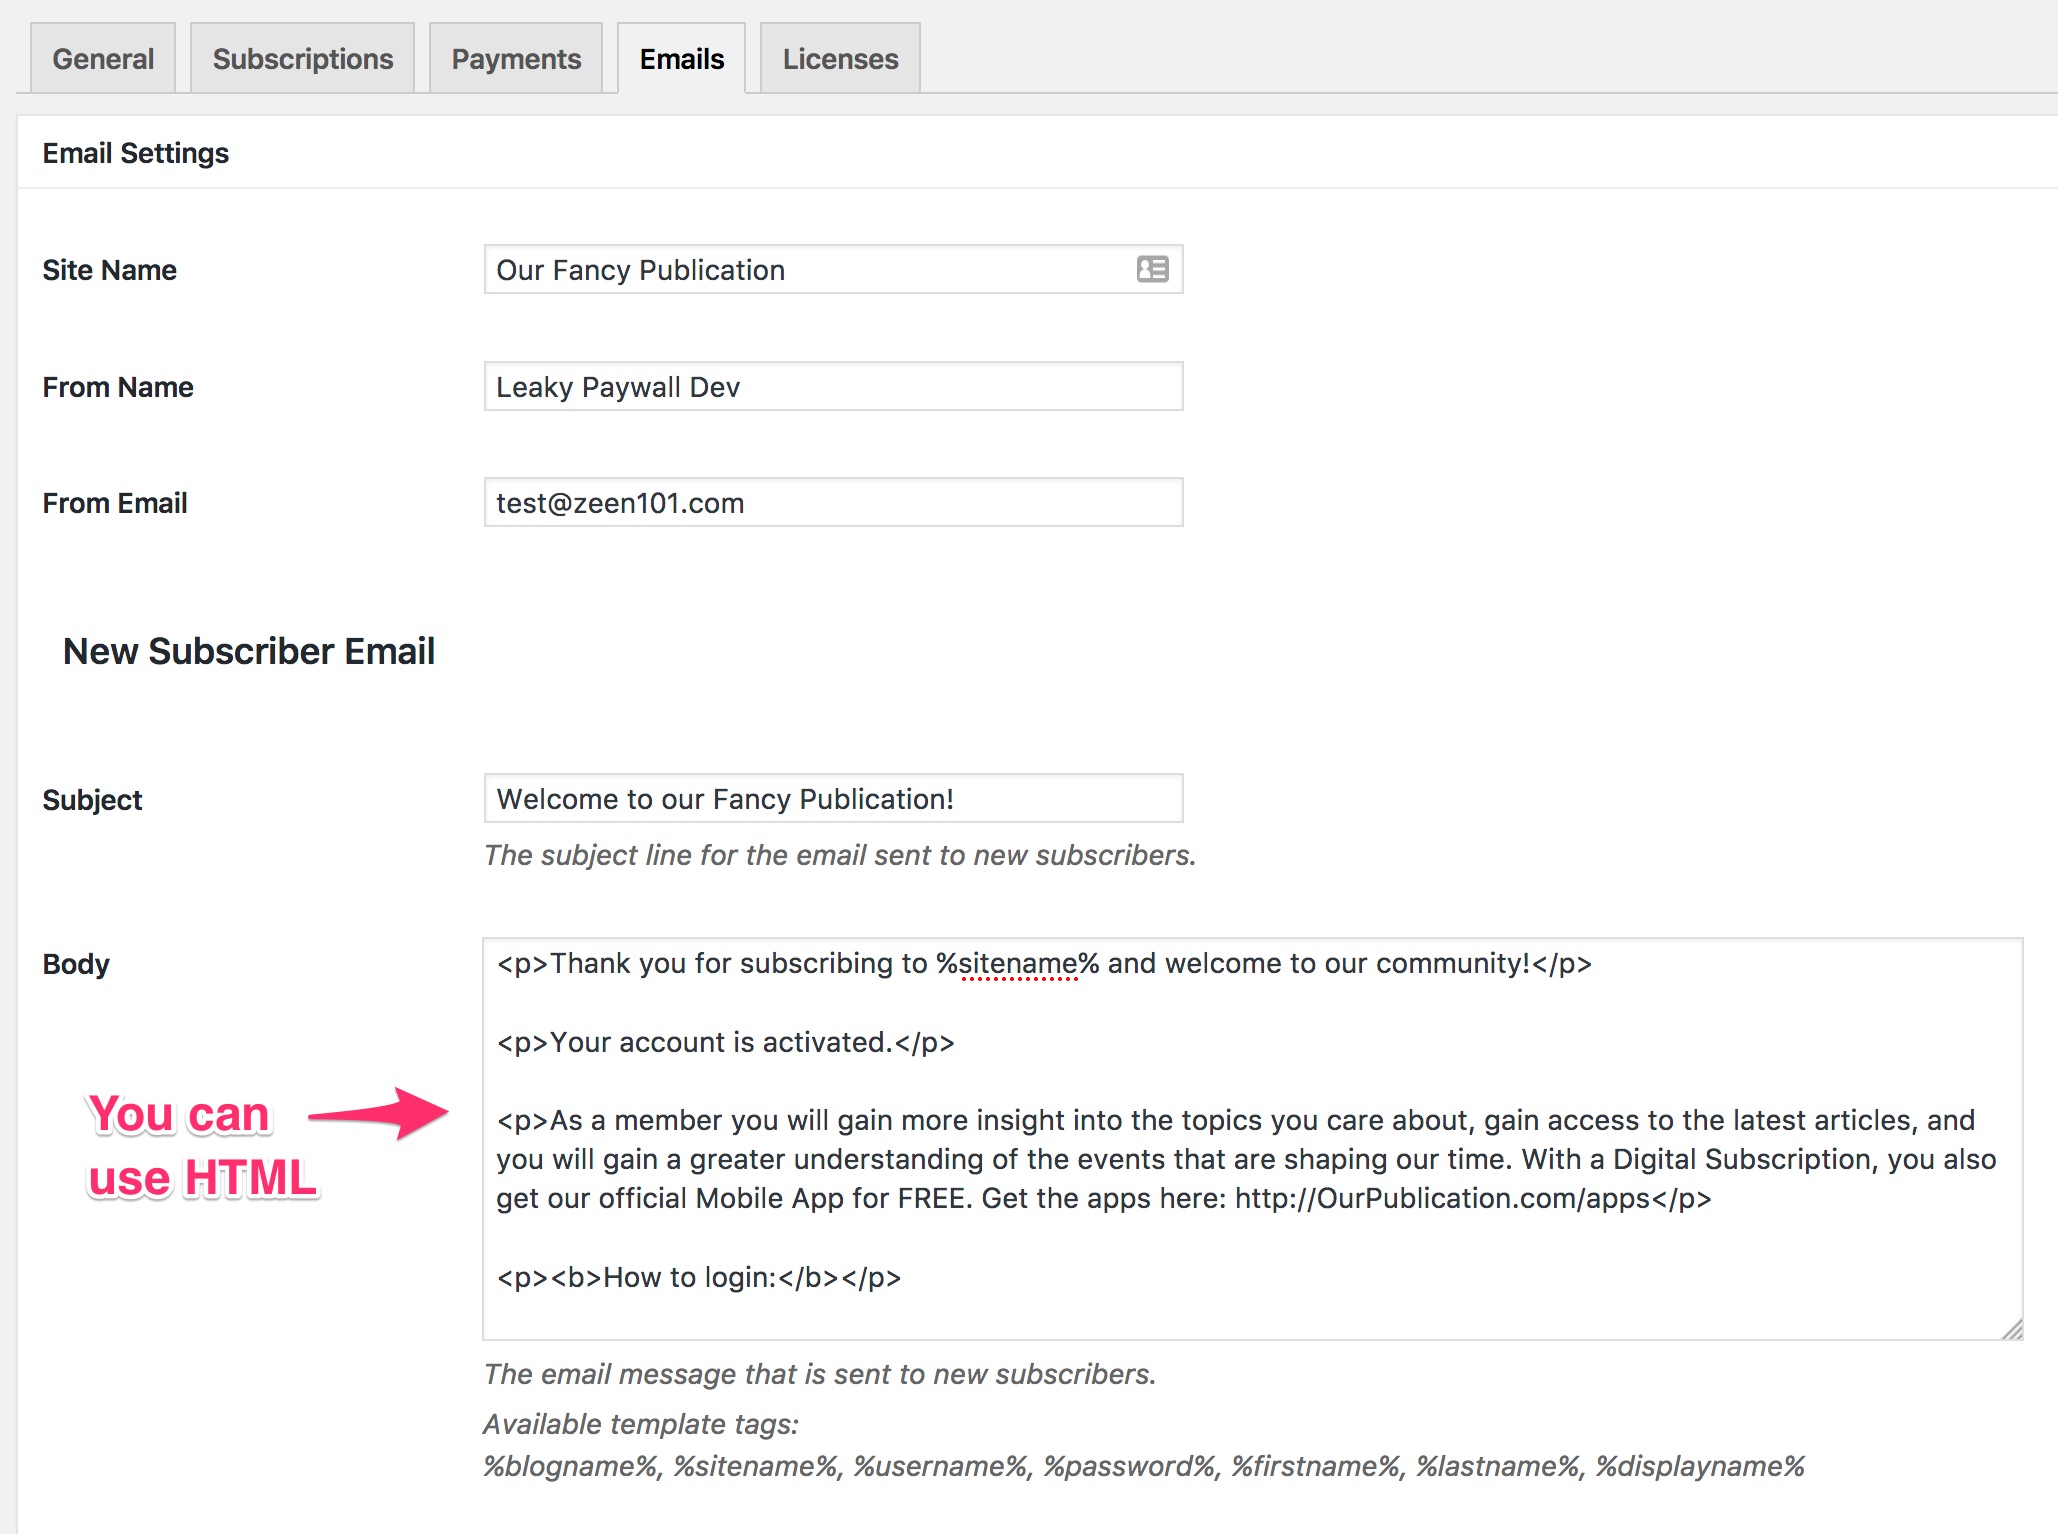
10. Create a welcome email message
New subscribers will get a custom message from you. You can use HTML for a fancier email if you like. Note: Stripe requires a $0.50 minimum transaction to trigger welcome messages.
Also, make sure you have a transaction email service set up to ensure email delivery.
11. Testing Subscription access
Log in as a subscriber to test the experience: https://docs.leakypaywall.com/article/173-how-to-test-subscription-access
12. Adding subscribers manually
If you are adding a few subscribers manually to kick things off make sure the Payment Method you select is 'Manual' Otherwise Leaky Paywall will try to contact Stripe/PayPal to verify access.
*Make sure you have our reCaptcha or Turnstile extension set up to help prevent form spammers.